
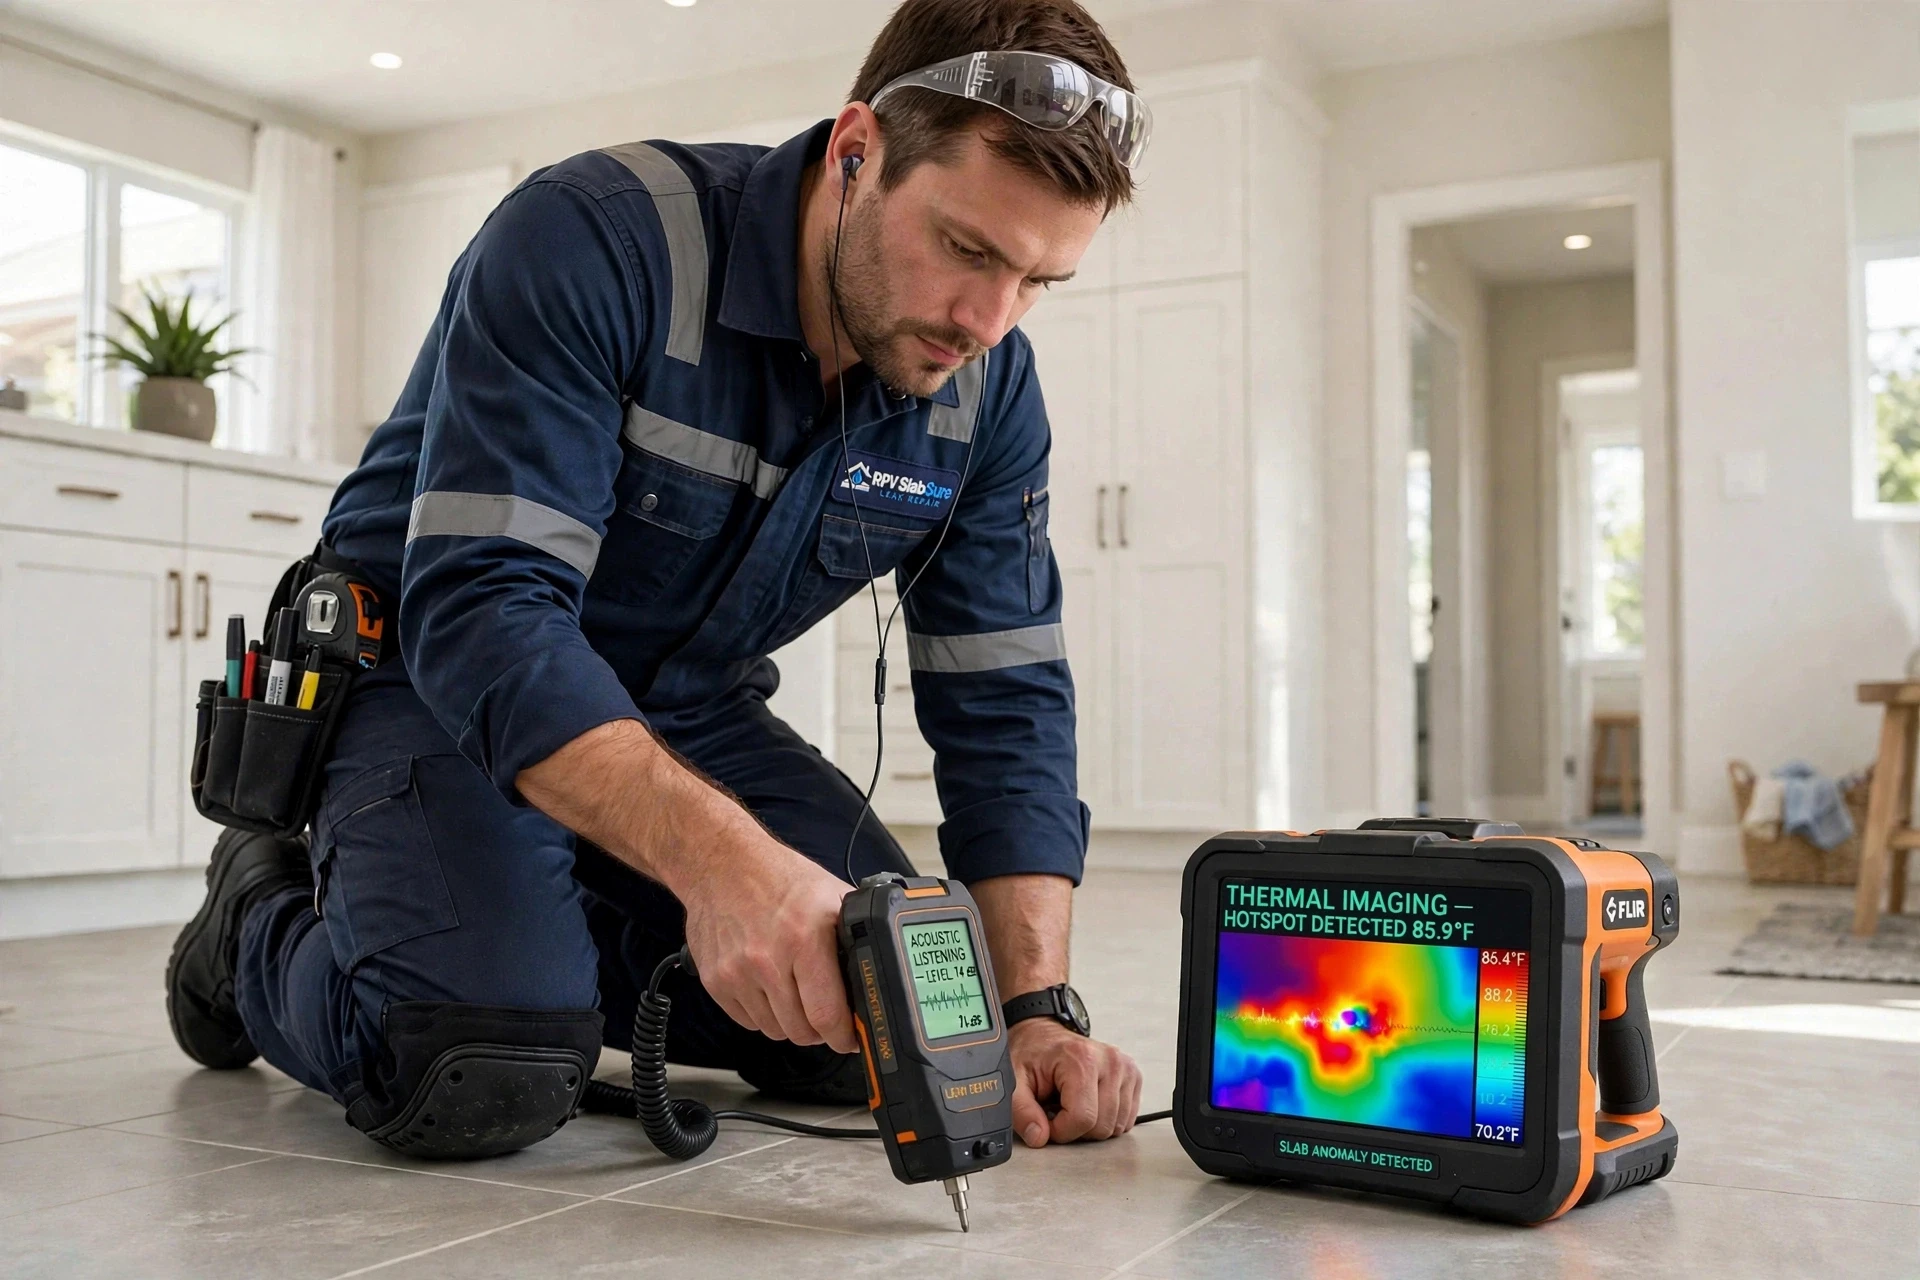
What is slab leak detection?
Slab leak detection is the diagnostic discipline of locating a water leak hidden beneath a concrete foundation — without opening the concrete to look. Think of it as medical imaging for your plumbing: a trained technician uses specialized instruments to "see" through the slab, triangulate the failure point, and mark it on your floor with confidence before any repair is planned.
This step exists because the alternative is unacceptable. Blindly breaking concrete to hunt for a leak destroys flooring, multiplies restoration costs, and often misses — water travels, so the visible damp spot is rarely directly above the breach. When you book through RPV SlabSure Leak Repair, the diagnostic comes first by policy: no reputable contractor plans a repair around an unlocated leak, and neither should you.
How professionals find leaks they can't see
A thorough detection visit layers multiple methods, each confirming the others. Here is what the equipment actually does.
Acoustic listening
Pressurized water escaping a pinhole makes a distinct high-frequency sound. Ground microphones and electronic listening devices amplify it while filtering out background noise, letting the technician sweep the floor and home in on the loudest point — often within inches of the breach.
Thermal imaging
Infrared cameras read surface temperatures across your flooring. A hot-water leak paints a warm plume through the concrete; even cold leaks can show as anomalies where evaporative cooling or soil saturation changes the thermal signature. The camera also maps how far water has spread.
Pressure isolation testing
By valving off sections of pipe and watching pressure gauges, the technician learns which line is failing — hot versus cold, kitchen branch versus bath branch — before ever listening for where. This step alone eliminates half the search area and distinguishes supply leaks from drain problems.
Tracer gas
For silent or stubborn leaks, a harmless helium-nitrogen mixture is introduced into the line. The gas escapes at the breach and rises through the concrete, where a sensitive sniffer detects it at the surface — effective even when water itself isn't reaching the surface yet.
Camera and line tracing
When evidence suggests a drain or sewer line rather than a supply line, a small camera travels the pipe interior to inspect it directly. Electronic line locators trace the buried path of water, waste, and drain lines so the technician knows exactly what runs where beneath your home.
8 reasons to schedule a detection visit
Unexplained bill increase
The number-one trigger for a diagnostic visit — water is going somewhere.
Sounds with taps off
Hissing behind walls or under floors deserves professional ears on it.
Floor temperature oddities
Warm zones or oddly cool damp patches map to what's happening below.
Visible moisture
Damp carpet edges, darkening grout, or baseboards pulling away from walls.
System-wide pressure drop
When every fixture weakens together, the system is losing water somewhere central.
Mildew smells
Musty odors near floors signal trapped moisture feeding microbial growth.
Heater working overtime
Constant water-heater cycling hints at a hot-side leak bleeding heat away.
Buying or selling a home
Smart buyers verify older slab homes before closing — a diagnostic is cheap insurance.
Why slab leaks are so hard to find without equipment
Three things conspire to hide slab leaks from homeowners. First, concrete is an excellent muffler and a poor witness: several inches of it sit between the leak and your ears, and water spreads laterally through soil before ever surfacing — so the wet spot you notice can be feet from the actual breach. Digging where the symptom appears is how DIY hunts go wrong.
Second, the failure itself is usually tiny. A pinhole leak from copper corrosion releases a thin jet, not a gush; it can run for months, quietly saturating the ground, before any surface evidence appears. By the time symptoms are obvious, the leak is mature.
Third, Rancho Palos Verdes homes complicate the picture further. Post-war slab construction buried entire plumbing systems with few access points, coastal soil stays damp enough to mask new moisture, and hillside lots add multiple pipe runs at varying depths. Professional detection exists precisely because human senses were never meant to diagnose through concrete — the instruments bridge that gap.
Simple checks that help the technician
These won't replace instruments, but they make the professional visit faster and more conclusive.
- Run the meter test. All fixtures off for 30 minutes, then check whether the meter moved. Note the result — it's the first thing a tech will ask.
- Map what you notice. Sketch which rooms have warm spots, sounds, or dampness. Patterns (one wing, near the water heater) narrow the search enormously.
- Check the water heater area. Puddling or corrosion at the heater can mimic slab symptoms — ruling it out saves diagnostic time.
- Photograph everything. Damp spots, meter readings, bill spikes. Documentation helps if insurance gets involved later.
Move furniture and rugs away from suspect areas before the visit so the technician can sweep floors freely. Leave the concrete alone — access decisions come after the diagnosis, not before.
Your detection visit, step by step
Here's exactly what happens when the technician arrives — no surprises.
-
01
Interview & walkthrough
Symptoms, bill history, home age, and prior plumbing work — then a walkthrough of suspect areas.
-
02
Pressure isolation
Sections are valved off and gauges watched to identify the failing line: hot, cold, or a specific branch.
-
03
Acoustic sweep
Listening equipment scans floors and walls, zeroing in on the sound signature of escaping water.
-
04
Thermal confirmation
Infrared imaging verifies the location and maps moisture spread around the breach.
-
05
Marked report & options
The spot is marked on your floor and you receive findings plus repair options — typically within the same visit.
What shapes the cost of detection
Detection is the most predictable phase of a slab leak job — a defined diagnostic visit rather than open-ended construction. Still, a few variables move the scope. See our cost guide for the full picture.
| Factor | Why it matters |
|---|---|
| Home size & zones | More bathrooms and longer pipe runs mean more area to sweep and isolate. |
| Leak cooperativeness | Loud, active leaks locate quickly; silent or intermittent ones need tracer gas and more time. |
| Supply vs. drain | Drain-side investigation may add camera inspection to the diagnostic toolkit. |
| Floor coverings | Thick stone or multiple flooring layers can complicate acoustic and thermal readings. |
| Access to valves | Reachable isolation valves speed pressure testing; buried or seized valves slow it. |
When detection can't wait
Most detection visits are scheduled within days — but call immediately when water is visibly spreading, you hear continuous flow with everything off, or a floor area is becoming saturated in real time. In those moments, shut the main valve first to stop the damage clock, then request emergency service: the diagnostic still comes first, it just comes now.
If the leak is severe enough that your water heater is exposed or pressure has collapsed, stop using water entirely until the visit. Running fixtures on a badly breached line can flood wall cavities far from the slab.
Slab leak detection FAQs
How accurate is electronic slab leak detection?
Very. Combined methods — acoustic listening, thermal imaging, and pressure isolation confirming each other — routinely narrow the location to within inches, which is why repairs can target such a small area of concrete.
How long does a leak detection appointment take?
Most residential visits take one to three hours, depending on home size, the number of plumbing zones, and how cooperative the leak is about making noise.
Will detection damage my floors or walls?
No. Electronic detection is entirely non-invasive — microphones, cameras, and gauges all work from the surface. Nothing is opened until you approve a repair plan.
Can detection tell a supply leak from a drain leak?
Yes. Pressure testing separates pressurized supply lines from gravity drains, and camera inspection examines drain interiors directly — a critical distinction, since the repairs differ completely.
What if the technician can't find the leak?
A thorough visit either locates the leak or rules the slab out — redirecting the investigation to irrigation, drains, or condensation. Either outcome saves you from unnecessary demolition.
Do I need detection before calling for repair?
Detection is the first phase of any professional slab leak job — no reputable contractor opens concrete without it. Booking the diagnostic is the correct first step; call (310) 555-0100 anytime.